
Table of Contents
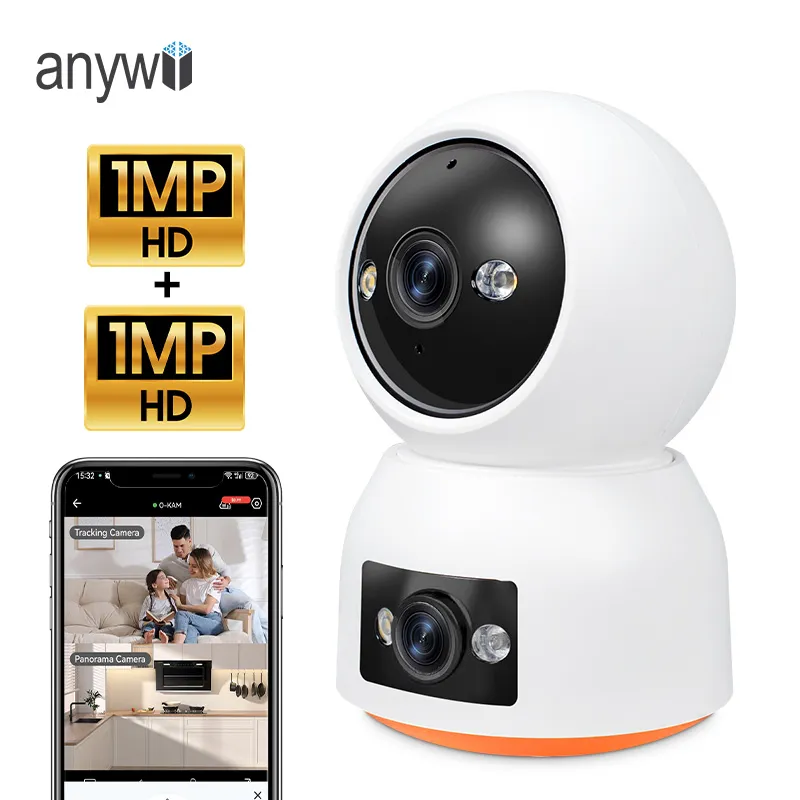
With the booming development of smart homes and security industries, various intelligent devices provide convenience for our lives. The wifi panorama camera, also known as wifi indoor camera, is one of the increasingly popular electronic products, known for its easy installation, effective monitoring of the home environment, real-time observation of the elderly, children, and pets at home. Especially the dual-camera design allows it to cover a wide environment and most of the area in the home with just one camera.
This latest 2024 wifi panorama camera setup tutorial will take the smart wifi camera P221A produced by Anywii as an example (applicable to most of such products on the market), hoping to guide all users who have purchased this type of device to complete the installation smoothly, and also hope to help all those interested to distinguish whether this type of product is suitable for them.
Preparations Before Setup
Step 1: Reset the Camera
After the camera is powered on, press and hold the reset button for 3-5 seconds. After hearing the prompt tone, the reset is complete, and you can wait for the restart. This action is to restore the camera to the factory settings to ensure that the installation will not be disturbed by any interference, such as IP conflicts, historical caches, historical network settings, etc.
Step 2: Download the WiFi Panorama Camera APP
Scan the QR code on the camera body to download the APP. Generally, the manufacturer will paste a sticker with a QR code or print it in the manual. After scanning, it will jump to the application download store corresponding to your mobile phone system, i.e., APPLE will jump to the Apple Store, and Android will jump to Google Play.
In our case, download the APP: O-KAM PRO.
Step 3: Register an Account in the APP
After the APP is installed, open the APP, click “Register”, you can register with your mobile phone or email, enter the corresponding account, receive the verification code, set the password to complete the registration.
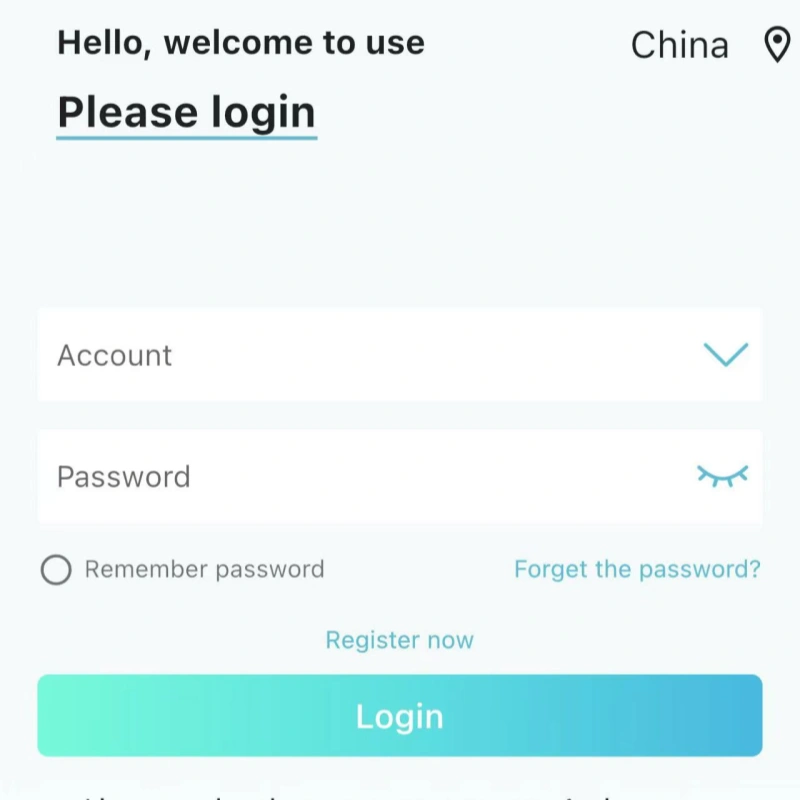
Please make sure to select the corresponding region where you are currently located when logging in to the account. The wrong region selection may cause a series of problems, such as language confusion in the APP, data needs to be passed through a server far away from your location causing camera image delay, connection interruption, and sluggish APP operation.
In summary, just select the region where you use the camera to avoid these annoying problems.
Add WiFi Smart Camera to Your Phone
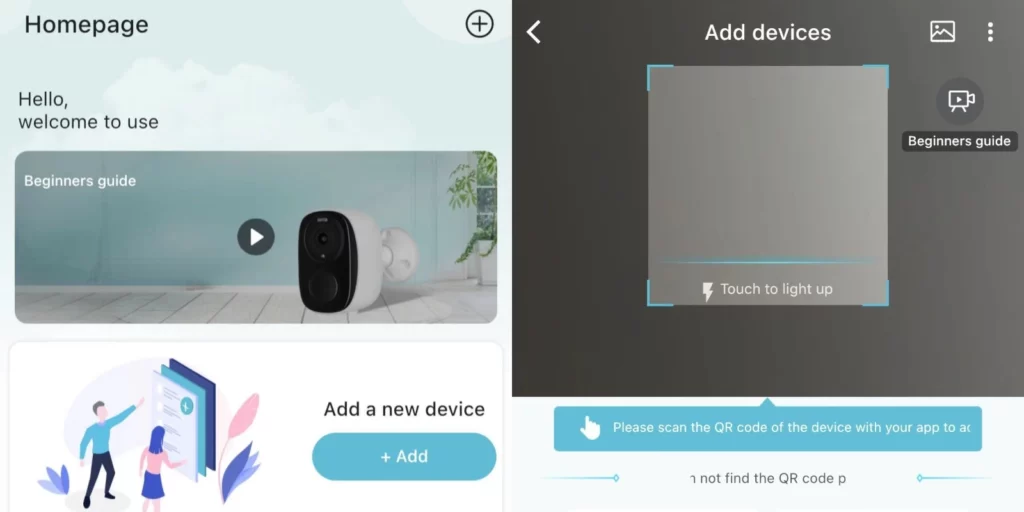
Step 4: Add device
Open the APP downloaded in the third step (in our example it is O-KAM PRO), click the ‘+’ in the upper right corner of the interface after logging in, and scan the QR code at the bottom to add our wifi camera. In some cases, other similar products do not have a QR code on the body, you can directly click ‘+’ and select ‘wireless camera’ to manually add our device.
Step 5: Connect to home WiFi
Select the wifi that the family is currently using, and enter the password. Before choosing wifi, please confirm whether the home wifi is 2.4Ghz or 5Ghz. A considerable proportion of wifi smart cameras on the market only support 2.4Ghz wifi, such as the P221A we are currently using. Normally, the manufacturer will indicate in the manual whether it supports 5Ghz wifi.
Step 6: Complete network pairing
After the WiFi is successfully connected, a QR code will appear on the mobile phone’s APP interface. Place the QR code 15-30cm in front of the camera lens for scanning. After hearing a beep, congratulations! You have completed the pairing of the phone and the camera, now you can use the phone to watch remotely, control images and use the rich functions on the APP.
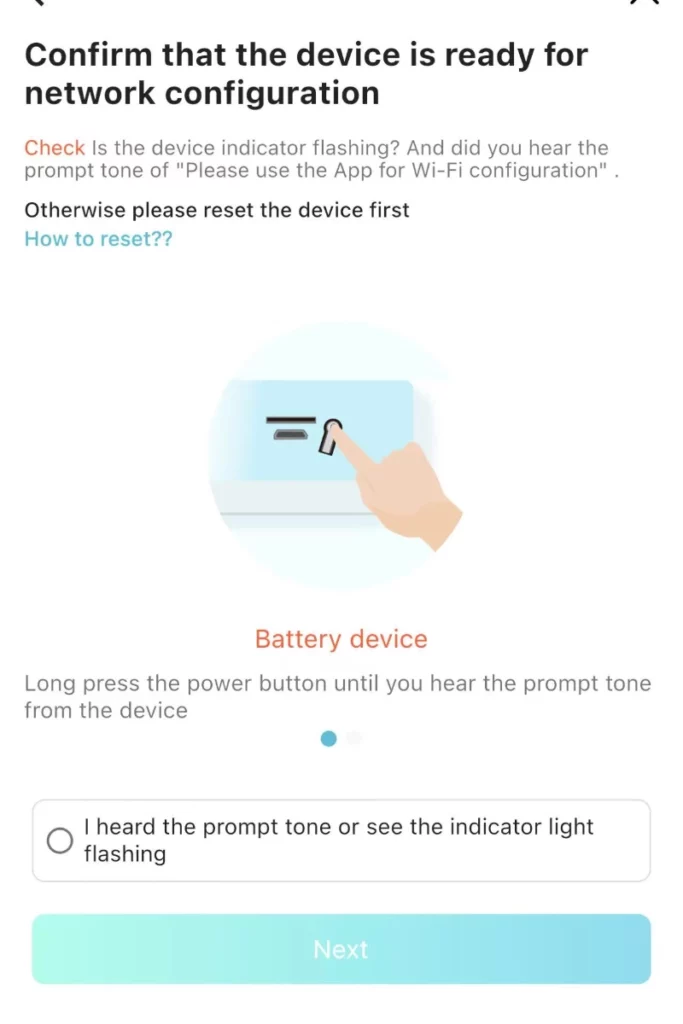
Step 7: AP network distribution (in case of network distribution error)
Unfortunately, there are sometimes network distribution failures. Please reset the device first, then select AP hotspot configuration, go to the mobile phone’s wireless WiFi setting interface, choose to connect to the “IPC-XXXXXX” device hotspot, after connecting to the hotspot, return to the APP, re-enter the camera settings to change the network adapter, when the device prompts that the network is successful, you can start using it.
Suggestions for some specific situations
- Before adding a wifi panorama camera, please make sure the phone is connected to the same wifi that the camera will connect to, to minimize the risk of connection failure.
- Generally, wifi cameras support subscription to cloud storage and TF card storage. When the capacity of the TF card is full, it will automatically overwrite the earliest content, so please confirm with the manufacturer in advance the number of days that can be recorded. If you prefer indoor camera without subscription, TF card would be a good choice.
- After the network pairing is completed, the wifi camera will be bound to the account in the APP. If you want to bind a new account, please delete the device or reset the device before you can bind a new account.
- If you change the router, please reset the device and reconfigure the new WiFi.
- There are many possible reasons why the device may appear offline on the APP after the device is successfully connected. Here is another article that specifically provides methods for bringing the WiFi panorama camera back online.
In conclusion, I hope this tutorial explains how to set up and install a wifi panorama camera, to ensure that you can use this device smoothly. We use Anywii’s wifi panorama camera P221A as an example, but these steps also apply to other similar products on the market. If you have any other questions or need to know more models and options, please visit Anywii’s product page to get more model information.